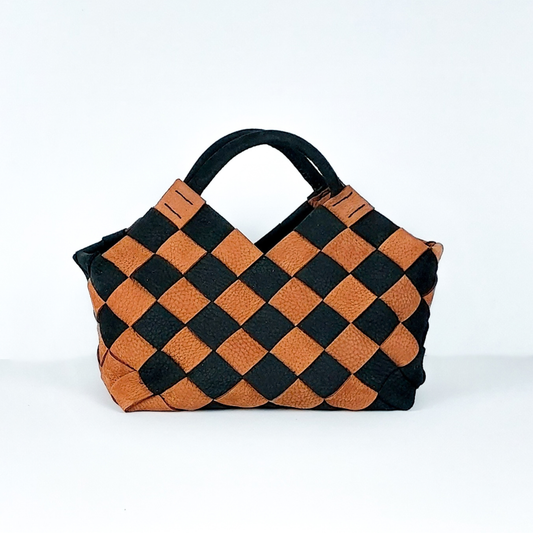


Meine Kroko Crossbody ist nicht die erste Tasche, die ich genäht habe, aber definitiv das starrste Leder! Die Tasche hat aber gut stand und passt zu vielen Outfits!😉
💗 Our first design, now convertible with a swap flap
🪡 Suitable for beginners - including success guarantee
👜 Detailed instructions for your professional result
🫶🏼 Handmade for you: delivery time 2 - 14 days
🎁 Free shipping within DE for this product
🌟 Made of high-quality cowhide leather in a smooth or grained structure
size of the bag
The crossbody has the following dimensions: 26 cm wide, 16 cm high, 7 cm deep, with a 20 cm wide inner pocket. A 0.5l bottle, a large purse and a few small items (glasses, make-up, mobile phone) fit into the crossbody. Your ideal companion for on the go.
exchange flap
The flap of this bag is attached to the back of the bag with five binding screws and can be swapped out as you wish. So you can customize the bag even more and match it to your looks. Alternatively, you can sew the flap permanently to the bag.
carrying options
With the different wearing options such as chain, statement belt or leather belt, you can style your crossbody both chic and casual - so you can quickly adapt the look of your bag to any occasion.
In the DIY box you will find everything you need to make your bag:
Leather, reinforcement and lining
Metal accessories in light gold or silver
Supplementary Materials & Tools
Step-by-step instructions & videos
You can optionally apply different personalizations to the crossbody. Choose between embossing, the trapunto technique or use pocket patches and rivets to customize your bag.
embossing
The embossing is applied to the leather during production. Letters are clamped into our machine, heated and pressed onto the leather with or without foil. The letters/shapes are approximately 8mm high.
You can choose:
trapunto technique
Here, forms made of bonded leather are glued between the leather and the lining and shaped against a firm base with an edge former. The result is a raised 3D effect that is more striking than the embossing due to the letter height of 6 cm.
The technique is implemented by yourself (video tutorial available) and is best implemented with our smooth leather or another thinner leather.
Here you choose:
Patches, bag charms, rivets
We also offer other personalization options such as leather bag patches, bag charms and rivets. You can order these as separate products in our online shop.
Also great for beginners!
It doesn't matter whether you're a DIY professional or have never worked with leather before - with our step-by-step instructions and video tutorials on the basics of leatherworking, you'll get all the important information you need to make this bag by hand yourself manufacture.
Since the materials are already cut out and provided with seam holes, they fit together exactly. This way nothing can go wrong and you can start production as soon as you receive your DIY box. Here we go!
Payment options
Shipping & delivery time
The delivery time is between two and twelve working days.
Sounds long? It is!
Since we produce most products manually to order with great attention to detail, we need this time. The production-to-order approach also allows us to offer you several products from the different leather colors instead of just one pre-produced model. Furthermore, we only produce what was actually bought - for responsible use of our resources.


Imagine you create something with your own hands and you can proudly say: I made it myself! An indescribably beautiful feeling that makes you appreciate your favorite bag even more.

Choose from countless color and style options and put together your DIY box according to your wishes. Personalize your leather accessory and make it something very special that nobody else has.

The DIY boxes are handmade in Germany after ordering. We pay particular attention to using high-quality materials to ensure that your unique piece has a long life.
Overall rating: 5.0 / 5 from 207 reviews.
Meine Kroko Crossbody ist nicht die erste Tasche, die ich genäht habe, aber definitiv das starrste Leder! Die Tasche hat aber gut stand und passt zu vielen Outfits!😉

Meine zweite Tasche von BAGS and PIECES und ich mag sie so gerne. Mit der Anleitung war sie gut zu fertigen. Die Farbe passt auch zu so vielen Kleidungsstücken und das Wichtigste wie Geldbeutel, Handy, Schüssel und Co passen super rein

Ich liebe das Taschenmodell, weil es für mich die perfekte Größe hat. Alles passt rein und durch die Velourklappe wirkt sie super edel für jeden Anlass ❤️

Meine etwas abgewandelte Crossbody liebe ich. Sie ist aus dem besonderen Epi-Leder. Passend dazu habe ich mir auch den Shopper genäht ❤️

Ich bin so begeistert von meiner allerersten selbst genähten Tasche! Hab mich für die ultimate crossbody mit Tauschklappe aus der special edition "peach saffiano" entschieden. Für mich als absoluter Anfänger im Leder -Handwerk war es mithilfe der Anleitung und vor allem auch dem Grundlagen guide überraschend gut machbar! Und weil ich mich so sehr freue hab ich mir jetzt auch den Adventskalender gegönnt und freue mich schon sehr darauf 😍 Instagram: #uli.wo.1

Meine vierte Tasche von BAGS and PIECES, dieses Mal The Ultimate Crossbody aus dem "Nicht"-Togo in Orange 🥰. Die Innenseite der Klappe habe ich mit Futterleder gefüttert mit Trapunto. Ich liebe alles an der Tasche. Den Statement Ring auf der Klappe wurde mit einer Brosche ergänzt, bzw. dem oberen Teil der Brosche (mit 2-Komponentenkleber verbunden).

Diese Tasche aus Togo Leder war wie alle anderen Taschen einfach nur super zu nähen.

Meine inzwischen vierte Tasche ist eine Crossbody aus Black Smooth Leder mit zwei Klappen: eine spitze Klappe mit Glitzernieten und eine eckige Klappe aus rosa-metallic Leder mit Eulen-Trapunto. Die Leder lassen sich in beiden Varianten wirklich super Verarbeiten und sind gut machbar. Vor dem Trapunto hatte ich großen Respekt, aber hat dann alles gut funktioniert und das Ergebnis kann sich echt sehen lassen. Einziger „Nachteil“: Ich kann mich kaum entscheiden, welche Klappe ich tragen soll – beide sind einfach zu schön 🤣

Meine Crossbody in Glowing Strawberry ist endlich fertig. 🤩 Die Fertigung hat dieses Mal etwas länger gedauert, was definitiv an dem sehr dickem Leder lag. Nichtsdestotrotz liebe ich das Endergebnis und freue mich schon auf den Sommer. ☀️

Die Mini Crossbody aua dem AK25 im Einhornleder. Auf Grund der Grösse etwas frimelig um die zweite Ecke zu nähen, aber passt schon 😁 mein Samsung Galaxy S25 und ein Kartenetui passen grad so rein. Den ganzen Schlüsselbund brauch ich dann aber nicht mehr reinwerfen😅

Gerade ist meine fünfte Tasche von B&P fertig geworden. Es hat wieder sehr viel Spaß gemacht und das Lederhandwerk ist zu meiner liebsten Entspannung im Alltag geworden. Diese Tasche in dem wunderschönen Tiffany Blue used metallic brauche ich für eine Veranstaltung morgen und habe es zum Glück noch rechtzeitig geschafft. Die nächste Box (Shopper) liegt schon bereit 🥰

Für meine allererste selbstgenähte Crossbody habe ich bei einem Storysale zugeschlagen und ein tolles Leder erstanden. Ich bin sehr stolz auf das Ergebnis! Herzlichen Dank auch an das tolle Support-Team, das unterstützend bei Fragen zur Seite stand!

Mein allerliebstes Bags & Pieces Modell ist die Crossbody. Habe schon mehrere gefertigt aus ganz unterschiedlichen Ledern. Hier in einem sehr besonderen black grain aus einer Special Edition 😊 Die Crossbody hat eine sehr schöne Größe und ist ein perfekter Alltagsbegleiter. Eine sehr gute Wahl auch als erstes Taschenmodell.

Meine erste Crossbody die ich genäht habe und meine zweite nach der Saddlebag. Das Leder ist Flieder Metallic in Krokooptik. Hab mich für den Leather Chain als Gurt entschieden, der gefällt mir richtig gut. Als Klappenfutter hab ich mich für einen eigenen Stoff entschieden und nach dem Videotutorial auf dem YouTube Kanal verarbeitet. Da es die zweite Tasche war, ging das nähen diesmal schneller. Und ich bin sehr happy mit meiner neuen Tasche.

Diese zeitlose Tasche wird mich bestimmt über Jahre begleiten! Das Leder in Grain der Standardkollektion ist super robost und die Crossbody ist vom Platz her super ergiebig. Eine 0.5l Flasche oder Schirm haben gut platz. Die Fertigung macht mega Spass und wird super erklärt. Die nächste Tasche ist bereits im Anmarsch ;)

Das ist meine zweite Crossbody von B&P. Da ich die Abläufe bei der Fertigung schon kannte, habe ich mich auf das Innefutter und die Trapuntotechnik konzentriert. Ich hatte wieder sehr viel Spaß und das schönste ist, wenn du die fertige Tasche endlich ausführen kannst. Hier habe ich im StorySale das Caviar Happy Coral ergattern können.

Vorsicht: Es macht süchtig 😉 Ich habe bereits mehrere Crossbody Bags gefertigt und alle trage ich sehr gerne. Die Crossbody hat für mich die perfekte Größe. Ich mag die Möglichkeit der verschiedenen Tragevarianten und Personalisierungen bei B&P. Die Fertigung der Tasche ist gut machbar, man bekommt natürlich bei jeder Tasche mehr und mehr Routine. Manche Leder sind z.B. fester, andere weicher in der Verarbeitung. Auch beim gleichen Taschenmodell hat am Ende jede Tasche ihren ganz eigenen Look!

Als mein zweites Projekt habe ich eine Crossbody Bag genäht – dieses Mal direkt mit einer Tauschklappe – und bin wieder absolut begeistert! 🧵💚 Für die Tasche habe ich das wunderschöne Leder aus der Special Edition Crispel in Mint verwendet und für die Tauschklappe das Standard-Glattleder in Beere – eine traumhafte Farbkombination, die in echt sogar noch schöner wirkt als auf den Bildern. Die Anleitung war wie gewohnt super verständlich, gut strukturiert und einfach umzusetzen, sodass alles genau so geworden ist, wie ich es mir vorgestellt hatte. Die Qualität der Materialien ist top, der Zuschnitt präzise, und die Tasche sieht absolut professionell aus. Ich freue mich schon aufs nächste Projekt – klare Empfehlung für alle, die Wert auf hochwertige DIY-Taschen legen!

Die Crossbody ist nicht meine erste Tasche , aber die , die ich am schnellsten fertig hatte. Sie ist ein sehr gutes Einsteigermodell und mit der guten Anleitung wirklich leicht zu fertigen. Die Innentasche habe ich mir mit einem Reißverschluss vernäht und sie nicht mit eingenäht. Ich habe hier für meine Tasche eine eckige Klappe mit Trapunto individualisiert. Es hat alles prima geklappt und ich kann es nur empfehlen.

Die Crossbody in Vanilla Grain hab ich als Geschenk gefertigt. Die Farbe passt im Grunde zu allem. Auch die Größe der Tasche ist für den alltäglichen Gebrauch prima. Die nächste wird dann meine.

Ich liebe die Farbkombi! Das Leder ist Caviar rund in lila und einem Beerenton. Ich mag den Kontrast der dreieckigen Klappe auf dem hellen Leder, aber auch die Originalklappe sieht gut dazu aus. Mit Kette wirkt sie sehr edel, mit Statementgurt etwas lässiger.

Die kleine Schwarze! Ich wollte unbedingt noch eine Crossbody in Schwarz als Basis für Tauschklappen haben und einfach als perfektes universelles Täschchen zu jedem Anlass. Hier mit einer Tauschklappe aus einem ehemaligen Story Sale liebe ich sie schon sehr und hatte auch viel Freude an verschiedenen kleinen Personalisierungs-Optionen. Das Schwarze Glattleder der Standardkollektion ließ sich super gut und leicht verarbeiten. Und auch ansonsten finde ich die Crossbody super gut zu nähen auch für Anfänger. Die Größe ist ebenfalls super!

Mit so einer Crossbody hat es bei mir angefangen. Ich finde, sie ist die perfekte Tasche für den Einstieg ins Lederhandwerk. Traut Euch! ☺️ Dieses Modell hier ist aus einem nude-farbenen Glattleder, welches es mal in der Standardkollektion gab. Auf der Klappe und dem Boden-Seiten-Teil habe ich Trapunto eingearbeitet. Das habe ich alles mit den DIY-Boxen von Bags & Pieces gelernt. Ich liebs!

Die Crossbody war in der Handhabung und "Herstellung" ähnlich wie die Saddlebag. Ich habe die Klappe zum ersten Mal an einer Tasche direkt angenäht, ohne die Option der Tauschklappe, was bei der Bearbeitung der Kanten und beim nähen zwischenzeitlich irgendwie störte :-( Aber man bekommt es trotzdem ganz gut gehandelt.

Es ist meine erste Tasche von B&P und Dank der Anleitung und Tutorials war die Fertigung sehr gut machbar. Mit einigen Anpassungen habe ich den perfekten Eyecatcher für mich gefertigt. Das Leder heißt Caviar Rund Bubblegum (vergangene Favoriten) und ist etwas fester im Griff. Es werden noch weitere Taschen folgen.

Perfect Match 💗🐝 Caviar Rund, ein so tolles Leder Die Crossbody kann man immer tragen 💗

In EPI Love 💜 Die Crossbody ist meine liebste Form zeitlos, mal sportlich und kann auch chic Perfekt um sie zu individuell zu gestalten . 💜💜💜

Es hat mega spass gemacht. Ich warte schon voller vorfreude au mein nächstes Projekt🤩

Die Ultimate Crossbody ist eine gute Tasche, die mit ihrem eckigen Design sehr elegant und edgy wirkt. Sportlich oder elegant, alles ist möglich mit oder ohne Metallteil ich finde sie immer schön. Sie ist ahch gut machbar, da alle Kanten nach außen bearbeitet werden. Kantenbebeitung ist dadurch natürlich ein wichtiges Thema, aber mit Zeitbund Geduld erzielt man ein schönes Ergebnis. Ich liebe vor allem die Special Editions.

Meine erste Tasche von euch - direkt komplettes Programm bestellt mit Taschenanhänger Ledergurt und Kette - und habe auch noch die Statementgurt Einfassteile hier liegen. Ich war froh an Gurt und Anhänger zu „üben“ bevor ich dann mit der Tasche gestartet habe. Man bekommt es als Anfänger wirklich super hin. Hinweise: Special Leder Shiny Grey aus den „vergangenen Favoriten“ / die gezeigte Tasche ist nicht individuell bearbeitet sondern wirklich nur so, wie es mit der Anleitung beschrieben ist und den Materialen der DIY-Box.

Meine erste Crossbody ist die zweite Tasche meiner Kollektion - nach der Pochette. Auch für mich als Anfänger gut machbar. Das Leder ist Crispel Petrol und hat sich gut verarbeiten lassen. Die Beschreibung ist sehr verständlich und die passenden Videos machen es noch anschaulicher. Es macht einfach sehr viel Spaß und hat bei mir einen gewissen "Suchtfaktor" ausgelöst. Weitere Taschenprojekte sind bereits am Entstehen. Die Produkte, das Unternehmen und der Support sind hochkarätig und absolut empfehlenswert!

Die Crossbody, Grain schwarz, war meine erste Tasche von BAGS & PIECES. Mit der super Anleitung war die Fertigung kein Problem. Das Nähen mit der Hand entspannt und macht viel Spaß. Für die Tasche habe ich mir auch eine Tauschklappe aus Grain Berry genäht. Die Tasche benutze ist seit einem halben Jahr fast täglich. Die Tasche ist gut für Anfänger geeignet.

In meiner Collection von Bagsandpieces-Taschen hat mir u.a. noch die Crossbody gefehlt. Als ich dieses schöne Leder gesehen habe, musste ich zuschlagen. Die Crossbody ist sehr gut zu meistern; auch für Anfänger gut geeignet. Auch hier ist die Anleitung sehr gut verständlich und die Videos tragen sehr gut zum Gelingen bei. Einfach ein tolles Konzept und ein wunderbares Hobby. Leicht süchtigmachend. Ich werde sie mit der langen Goldkette tragen und freue mich, sie auszuführen.

Mein zweite selbst gemachte Tasche und ziemlich sicher nicht die letzte)) Es macht so viel Spaß, die Tasche entstehen zu sehen und plötzlich ein echtes dreidimensionales Unikat in den Händen zu haben! Dank der Tutorials hat alles gut geklappt und meine Fragen an den Kundenservice wurden rasch und gut beantwortet. Suchtpotential))

Ich habe mich an mein erstes Projekt getraut. Als erstes hatte ich mir einen Musterfächer bestellt. Dadurch fiel mir die Auswahl des Leders leichter. Dann hatte ich mich durch Viviane beraten lassen. Sie empfiehlt mir eine Crossbody. Zusätzlich habe ich mir einen Schlüsselanhänger und das Brillenetui bestellt. Mit dem Schlüsselanhänger habe ich mein erstes Lederprojekt gestartet und dann habe ich das Brillenetui gemacht. Dadurch ist mir das fertigen der Tasche deutlich leichter gefallen. Ich habe mir auch den Nähkloben gegönnt. Zum Glück. Dadurch ist es mir viel leichter gefallen zu nähen. Hatte es auch ohne Probiert, aber es ging einfacher mit. Unbedingt vorher alle Videos anschauen. Das hilft. Würde auch eine weitere Tasche machen. Den Shopper oder so. Das einzige, was mir nicht so gelungen ist, sind die Ledergurte. Diese haben nach der Kantenbearbeitung Abdrücke von den Klammen behalten. Da muss ich beim nächsten mal etwas anders machen. Nur was, das weiß ich noch nicht.

Diese wunderschöne Tasche war nun meine Dritte 😅. Mit der bereits dazugewonnenen Routine war die Tasche absolut gut machbar. Einzig die in dem Fall etwas flüssigere Kantenfarbe hat mir das Leben manchmal nicht so leicht gemacht. Das Ergebnis ist wunderschön geworden. Ich kann die DIY Sets uneingeschränkt weiterempfehlen.

Ich liebe meine neue Ledertasche aus diesem tollen Caviar Leder in der Farbe Cappuccino. Das Leder ist so edel mit dem leichten Glanz. Ich habe eine eigene Schließe und einen eigenen Taschengurt verwendet. Es ist so toll, dass es mittlerweile die Gurteinfassteile für den Statementgurt auch einzeln gibt. So kann man die Tasche noch individueller gestalten. Insgesamt finde ich die Crossbody tatsächlich etwas herausfordernder als die Saddle Bag. Klar machbar, aber sie hatte ein paar herausfordernde Stellen bei der Fertigung (ich bin allerdings auch Perfektionist) Jetzt bin ich mir auf jeden Fall sicher: das ist mal wieder eine meine Lieblingstaschen 😄

Meine neue Summer-Bag in Off-White Caviar aus einem Insta-Sale. Tolles, elegantes Design. Das persönliche Futter habe ich das erste Mal mit Vliesfix befestigt, daher konnte ich diese perfekte dünne Baumwolle nehmen. Liebe diese kleinen Personalisierungen.

Designerleder made in heaven ♡ - es war eine wahnsinnig tolle Erfahrung dieses Leder verarbeiten zu dürfen. In diesem Fall sieht man sehr offensichtlich die Designermarke, die hinter dem Leder steht. Aber auch sonst stecken sehr häufig hinter der Ledern aus Special-Editions sämtliche bekannten Luxus-Ledermarken. Gerade das macht es für mich so faszinierend, soviele tolle Leder bearbeiten zu dürfen, die ich sonst nie in den Händen halten dürfte. Die Sattlernaht ging in diesem Fall durch dieses besondere Leder sehr easy durch die Schichten. Ich habe alles gegeben um aus meiner zweiten Crossbody ein Masterpiece zu machen. Es hat geklappt! Die Fertigung der Crossbody ist gut machbar, ich persönlich würde sie aber nicht absoluten Anfängern empfehlen.

Ich liebe den Prozess bis hin zur fertigen Tasche. Das war meine erste Crossbody und auch dieses Taschenmodell war wieder mit der Schritt für Schritt Anleitung gut zu fertigen. Die nächsten Taschen sind schon wieder in Arbeit. ❤️

Our DIY box is designed so that you can make your own bag without any previous knowledge of leather craftsmanship. All the materials you need are included in the DIY box, you don't have to buy anything else.
The highlight of our DIY boxes:
The parts are already cut and provided with holes for sewing. This way we can guarantee that everything fits together perfectly and that you can sew the bag by hand without any effort. When it comes to metal accessories, too, we make sure that we only use parts that can be attached without special machines and are still firmly fixed.
As soon as you have put together your DIY box, you will receive an e-mail from us with the order confirmation and access to the instructions and basic videos. You can then look at these in advance or when your DIY box arrives. And then you can get started!
Our clear answer: YES!
Why are we so sure about that?
Because over 7,000 people have already sewn one of our DIY boxes and over 92% of our customers have never worked with leather before or have only done small handicraft projects. Because the leathercraft techniques of gluing , sewing and edge processing are repeated over and over again and because we have created detailed explanatory videos for all three topics, you will have learned everything you need to make your leather accessory in just a few minutes.
In addition, the leather parts are already cut and provided with sewing holes. So, technically, there's only one sensible way for the pieces to fit together. Of course, we have also explained this with photos and text in our step-by-step instructions.
If, contrary to expectations, you have any questions, our popular and highly rated customer support will be happy to help you. You can reach us Monday to Friday from 9 a.m. to 5 p.m. via email at hello@bagsandpieces.co.
An important clue:
This DIY project is perfect for you if you like trying new things and generally have a certain affinity for DIY and crafting. You don't need to be particularly handy, but you should still enjoy making your own and be willing to learn new techniques.
As a rough guide, the crossbody takes about 8 to 10 hours to manufacture (including drying times for the edge paint). If you have never made a bag before and are looking at the instructions and videos for the first time, it may take a little longer.
Sounds long?
It is! In the end, however, this is what differentiates handmade things from fast fashion. Many of our customers say that they have a completely different appreciation for their handmade products and are incredibly proud to own a 100% individual and handmade handbag. And beware: addictive!
So if you want some me-time, a balance to your everyday life or some creative time with friends and you enjoy learning new techniques, then time flies by. You can also split the steps up. Another advantage: the production does not take up much space and you can pack and unpack your DIY box whenever you have time.
The leather in our standard collection comes from a Veneto tannery that has been working with leather for more than 20 years and supplies many well-known luxury leather goods labels. With innovative methods, especially in the area of water treatment and resource-saving techniques, the tannery combines traditional craftsmanship with modern expertise.
The leather in our special editions mostly comes from surplus sales in Tuscany or is our own production that we commissioned from Italian tanneries. Surplus sales are leftover stocks from major luxury leather goods labels who no longer want to use these leathers as they work in seasonal collections. The leather is carefully selected by us on site, so that we can also offer very good quality and great features here. Treasure hunt, next level!
The other materials such as metal accessories, straps and other supplementary items come from suppliers in the leather processing industry. We source these from all over the world but especially Italy, Spain, Portugal, China and France depending on where we can find the best product for your DIY box.