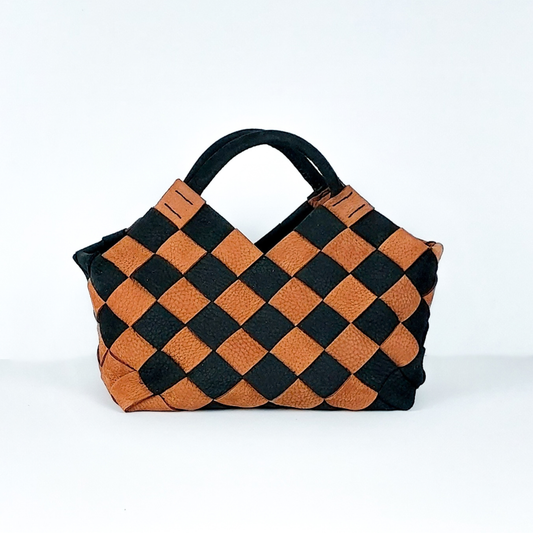


Das ist meine meist getragene Tasche, im Job immer dabei. Tipp beim Nähen einen Hosenbügel mit Klemmen nutzen um frei stehend Nähen zu können.
💗 Your elegant companion in everyday work (and everywhere else!)
🪡 Can also be done as a masterpiece for patient beginners
👜 Detailed instructions for your professional result
📦 Free shipping within DE for this product
🌟 Made of high-quality cowhide leather in a smooth or grained structure

The Business Bag - here comes your masterpiece in handbag form, elegant and modern at the same time. Whether you're at work or in your free time, you'll always be stylish and chic with this bag. It also offers plenty of storage space, so you can take a little more with you.
Thanks to the many different variants and style options (see next section), you can tailor the bag exactly to your needs and style.
Size of the bag
External dimensions: 38 cm wide at the bottom, 35 cm wide at the flap, 26.5 cm high, 12 cm deep at the bottom, approx. 6 cm deep at the top edge of the bag (flexible).
Internal dimensions of the bottom: 35.5cm wide and 11cm deep. The top opening is 28-34cm wide and 7-9cm deep, depending on how far you open the bag (all measured without bulging the bag).
Handle opening: 22cm wide and 13cm high (at the highest point). The business bag can hold laptops with a screen diagonal of up to 15" (sometimes also 15.5"), a large water bottle (1 liter), a lunch box, an additional removable inner pocket such as a pochette or pouch, a large wallet, and various other small items such as charging cables, keys, glasses case, etc.
Carrying options
The business bag contains a reinforced and padded flat handle that is attached to the bag flap. To ensure stability, this is processed with a stainless steel strut in the flap.
In addition to the permanently sewn-on handle, you can attach other carrying options such as chains, leather straps or statement straps to the double D-ring on the flap.
You also have the option of attaching additional D-rings with edging parts to the sides of the bag if you prefer to attach your carrying option there. To attach the D-rings to the leather, you have to pierce the holes in the leather of the side parts yourself (template included in the instructions).
Interior processing
The canvas-lined bag contains an interior pocket with a leather slip pocket and a leather-covered inner bag base.
Voting options:
Note: The screw holes and cutouts for the different clasp variants must be made in the leather yourself. You will receive templates to print out to determine exactly the right position. At the end of this section you will find detailed explanations of the necessary steps for each clasp variant.
Optional additions:
Detailed explanations of the necessary work steps for each closure variant:
In the DIY box you will find everything you need to make your bag:
Leather, reinforcement and lining
Metal accessories in light gold or silver
Additional materials & tools
Step-by-step instructions & videos
You may receive additional optional items if you selected them in the configurator. You can also deselect the reusable tools if you already have them.
Choose between embossing, the trapunto technique or use pocket patches and rivets to personalize your bag.
Embossing
The embossing is applied to the leather during production. Letters are clamped into our machine, heated and pressed onto the leather with or without foil. The letters/shapes are approx. 8 mm high.
You can choose:
Trapunto technique
Here, shapes made of leather fiber are glued between the leather and the lining and formed against a solid base using an edge former. This creates a raised 3D effect that is more noticeable than the embossing due to the letter height of 6 cm.
The technique is implemented by you yourself (video tutorial available) and is best achieved with our smooth leather or another thinner leather.
Here you choose:
Patches, bag charms, rivets
We offer additional personalization options, such as leather bag patches, bag charms and rivets. You can order these as separate products in our online shop.
Feasible for beginners with enough patience or for anyone who has already made one of our DIY boxes!
Whether you're a DIY pro or have never worked with leather before - with our step-by-step instructions and video tutorials on the basics of leatherworking, you'll get all the important information you need to make this bag yourself by hand.
Since the materials are already cut out and provided with sewing holes, they fit together exactly. This means nothing can go wrong and you can start manufacturing immediately after receiving your DIY box.
Despite everything, we only recommend this project to people who have the time and patience for this masterpiece.
We estimate the production time for this bag to be 20 - 25 hours, of which around 8 hours are spent making the flap with handle (rough estimate, difficult to make general statements). The bag is more complex in its construction and the number of steps involved than other of our bags. However, the individual steps are not complicated. So if you follow the instructions step by step, even a beginner can make this masterpiece. Let's go! 🙌🏼
Payment options
Shipping & Delivery Time
The delivery time is between two and twelve working days.
Sounds long? It is!
Since we produce most products manually to order with great attention to detail, we need this time. The process of producing to order also allows us to offer you several products in the different leather colors instead of just one pre-produced model. Furthermore, we only produce what has actually been purchased - for responsible use of our resources.


Imagine you create something with your own hands and you can proudly say: I made it myself! An indescribably beautiful feeling that makes you appreciate your favorite bag even more.

Choose from countless color and style options and put together your DIY box according to your wishes. Personalize your leather accessory and make it something very special that nobody else has.

The DIY boxes are handmade in Germany after ordering. We pay particular attention to using high-quality materials to ensure that your unique piece has a long life.
Overall rating: 5.0 / 5 from 43 reviews.
Das ist meine meist getragene Tasche, im Job immer dabei. Tipp beim Nähen einen Hosenbügel mit Klemmen nutzen um frei stehend Nähen zu können.

Ergänzung zu meinem vorherigen Post, da sich dieser nicht bearbeiten lässt, der Link funktioniert leider nicht. Noch ein paar Detailansichten.

Ein langwieriges und anspruchsvolles Projekt. Bei Togo wollte ich nichts falsch machen, aber trotzdem vieles an der Tasche anpassen: 1. Komplettes Lederfutter 2. Kontrastnaht 3. Kleines Aussenfach für Smartphone oder Schlüssel 4. Die innere Tasche als entnehmbare Pouch 5. Noch ein kleines offenes Innenfach 6. Einen Griff im Stil der Kelly Bag 🤯 Kurz und knapp: let's make this a little bitte more complicated 🤣😂 but worth it. Aber das Ergebnis ist ein Traum und sie fasst tatsächlich knapp ein 16"-Z-Book mit Ladekabel und Maus 😍.

Eine absolute Traumtasche und für jeden „Bags and pieces-Fan“ ein must have ❤️❤️❤️

Mit dem Lederfutter definitiv eine Herausforderung und Fleißarbeit. Dafür aber die Kantenbearbeitung ein Traum.

Die Business aus dem Crispelleder .- Lipstick war mein zweites großes Taschenprojekt. Das Trapunto war etwas herausfordernder, da das Leder recht steif ist. Aber mit Geduld und einem Föhn ging es dann ganz gut. Das war nicht die letzte Tasche von bags&pieces.

Nachdem ich schon ein paar Saddles und Minis gemacht habe, wagte ich mich an eine Business Bag. Bei dem wunderschönen Rosa Matt grain konnte ich nicht wiederstehen. Ist total meine Farbe. 🥰 Zum verarbeiten war das Leder ein Traum. So leicht ging noch keine Tasche zum nähen, es war Butterweich. Ich freue mich schon, sie auszuführen.

Ich musste bei EPI-Leder einfach zuschlagen! Die Box hat ein wenig Zeit in Anspruch genommen aber ich liebe die Tasche wirklich sehr 🥰❤️

Ich hatte schon länger nach einer größeren Tasche für Laptop und DIN-A4-Format gesucht. Die Business Bag, die ich aus dem Standardleder Grain in der Farbe Sage genäht habe, ist dafür perfekt. Das DIY-Projekt ist herausfordernd und zeitlich umfangreich, aber mit Hilfe der ausführlichen Anleitung gut zu schaffen. Mit dem Endergebnis bin ich sehr glücklich und freue mich die Tasche im Alltag zu nutzen.

Für meinen neuen Job habe ich mir eine Business gegönnt und bin total happy damit. Ich werde öfters auf die Tasche aus Epi Lilac angesprochen und die Leute sind jeweils sehr erstaunt, wenn ich mit "selbstgemacht" antworte. Nachdem ich bereits zwei Minis genäht habe, war die Business sehr ähnlich, einfach in gross und etwas störrisch (durchs Epi-Leder). Schwierig fand ich das Ankleben der Klappe. Mit einem zusätzlichen Hände-Paar und Haarföhn hab ichs dann hingekriegt. Ich habe die Innentasche an die Vorderseite genommen und am Rückenteil einen Riemen als Laptop-Halter eingenäht. Das bewährt sich tiptop.

Mit meiner #BusinessBag aus Caviar-Leder (Caviar Rund Sage) errege ich meist positives Aufsehen und erhalte viele Komplimente. Es ist ein Masterpiece und eine Herausforderung, die ich gerne angenommen habe und die mit der guten Anleitung Schritt für Schritt machbar ist. Zuerst eine Timeless Mini zu erstellen ist eine sehr gute Übung denn beide Taschen sind vergleichbar konstruiert.

Eine mega Business Bag aus Kroko taupe glänzend. Was für ein edles Teil. Die Kanten sind noch nicht bearbeitet. Aber schon jetzt ein absolutes Masterpiece 🤩

Nach meiner ersten Tasche (Saddle) musste es eine Business sein und ich hab mich riesig gefreut, ein so tolles Leder zu ergattern! Mir macht es Spass, auch mal vor einem kniffligeren Step zu stehen und diesen dann zu meistern, daher waren die kleinen Herausforderungen bei mir herzlich willkommen! :)

Nach einer Saddlebag und einer Timeless Mini war dies meine 3 . Bags& Pieces Tasche aus schokobraunem Leder einer Spezialedition. Das Leder war sehr gut zu verarbeiten, nicht ganz unempfindlich, aber wunderschön in Optik und Haptik. Die wirkliche Challenge war für mich selbstständig Löcher in dieses wunderbare Leder zu stechen, um den Henkel und die seitlichem D-Ringe anzubringen. Auch das Ausschneiden des Verschlusses habe ich ungefähr 100 mal überlegt. Für dieses wunderschöne Endergebnis hat es sich aber gelohnt. Die nächste Tasche ist schon in Arbeit 😍

Die Business Bag war ein tolles Projekt und gut umsetzbar, vor allem wenn man vorher schon andere DIY-Boxen genäht hat. Am längsten habe ich an der Schließe gerätselt, wie genau sie funktioniert und sie natürlich vorschnell erstmal falsch herum angebracht - aber auch das ließ sich erstaunlich gut beheben.

Wie immer hat es viel Spaß gemacht eine Ledertasche selbst zu nähen. Da ich schon einige gemacht habe, hatte ich keine Schwierigkeiten mit der Fertigung der Businessbag. Mit Hilfe der guten Anleitung ist die Tasche sowieso ohne Probleme gut machbar. Besonders gefällt mir das Leder einer Special Edition (die es regelmäßig zusätzlich zur Standardkollektion gibt), das ich für meine Businessbag genommen habe.

Man merkt wie viel Liebe und Fachwissen in den DIY-Boxen von Bags&Pieces steckt. Sie ermöglichen allen kreativ Interessierten, sich selbst in das Lederhandwerk rein zu fuchsen. Auf Basis der Business-Bag mit eckiger Klappe hab ich einige individuelle Details in meine Tasche eingearbeitet. Mit ein bisschen Vorerfahrung waren die auch ohne Anleitung von Vivian super machbar. Mit den separat erhältlichen Einzelteilen und Lederreste-Boxen konnte ich so meine Version der Business erfolgreich umsetzen.

Ich habe mir die Business Bag in einem besonderen genarbten Leder eines Luxusdesigners gegönnt. Ich gehörte noch zum ersten Testlauf des Leders. Ein unfassbar tolles Leder. Unbeschreibliche Haptik. Irgendwie pudrig?! Die Business Bag hat eine schöne Größe. Ich bin begeistert. Die Herstellung war leicht.

Ich liebe meine Business Bag 🤩🤩 Ein sehr schönes Projekt, mit dem ich viele tolle Stunden verbringen konnte. Slow Sewing bekommt da eine ganz neue Definition 🧵 Jeder Schritt war super beschrieben und gut machbar. Ich bin jetzt bereit für ganz viele Tauschklappen, liebe aber auch die schlichte und edle Variante.

Meine absolute Lieblingstasche, die jeden Bürotag mitmacht. Dank der tollen Anleitung super umzusetzen mit viel Platz für Individualisierungen - meine hat zb eine Rucksackfunktion bekommen und wurde innen mit einem Stickbild verziert.

Die Buisness bag ist mein ganzer Stolz und die Farbe Barry ein Traum. Sie war mein 2. Projekt nach einer Pouch. Es war herausfordernd aber sehr gut zu meistern mit Hilfe der Beschreibung und den Videos. Ich bin jetzt richtig infiziert und liebäugle schon mit der Mini🥰

Meine erste Business Bag. Etwas mehr Schritte, als bei den anderen Modellen, aber die Anleitung ist super. Insbesondere die Videos sind sehr hilfreich. Ist täglich im Einsatz.

Mein Masterpiece - diese Tasche braucht ihre Zeit, ist aber wie jede Tasche von B&P dank der sehr ausführlichen Schritt für Schritt Anleitung gut machbar. Als Leder hatte ich das wunderschöne Caviar Leder in stone beige aus einer Special Edition. Die Farbe ist hammer und das Leder ließ sich so wahnsinnig gut verarbeiten! 😍. Meine Tasche ist mittlerweile seit zwei Monaten tagtäglich im Einsatz und hält allen Anforderungen mit Bravour Stand. Ich bin super happy damit und stolz wie Bolle, dass ich dieses Masterpiece selbst genäht habe 🩷

Meine erste Tasche (klar beginnt man direkt mit dem Master-Piece) in der „Bochum-City-Girl“ Variante - ich liebe sie und sie begleitet mich jeden Tag.

Meine Business Bag in dem wunderschönen weichen Grain Leder in Midnight Blue aus der Standartkollektion. Ein absolutes masterpiece. Bin total verliebt in meine neue Tasche. Genau die richtige Größe um mit zu Arbeit zu kommen. Ein richtiges Raumwunder. Mit Hilfe der tollen Videos von Vivien ist die Tasche mit etwas Geduld gut herzustellen.

Beim Launch der Business Bag wusste ich direkt - das wird meine zukünftige Arbeitstasche! Klassisch, elegant und doch einfach individualisierbar!😍 Es ist meine erste DIY Box von Bags & Pieces, aber sicher nicht die letzte! Die Anleitung war wirklich einfach nachzuverfolgen und wenn ich dann doch nicht weiterkam, was bei der ganzen Tasche nur einmal vorkam, hat der Support direkt geantwortet. Das Leder lässt sich super verarbeiten und bei allen Teilen merkt man die Liebe und Sorgfalt, mit der sie ausgewählt wurden. Ich hab mir sogar eine Individualisierung mit aufgesetzter Reißverschlusstasche zugetraut, mit der die Tasche auf meinen Koffer aufgesetzt werden kann.💪 Seit der Fertigstellung ist die Tasche fast täglich im Einsatz und die Magnetknöpfe haben sogar einem Umzug standgehalten, bei dem ich das Fassungsvermögen voll ausgenutzt habe. 😅

Ich hab meine 2. Business Bag aus einem grünen Kroko Leder, und was soll ich sagen, ich find sie einfach sooo unglaublich schön 🤩

Ich bin total begeistert. Da passt alles für ein Büroarbeitstag rein. Ein richtiges Raumwunder.

Die Fertigung war definitiv kniffeliger als die Saddle aber durch die neu gewonnene Routine ganz gut machbar. Gerade hier würde ich den Klebespachtel sowie die Stanzwerkzeuge empfehlen. Bei der Drehschließe quer hat das echt Sicherheit gegeben. Ich freue mich schon auf mein nächstes DIY Projekt!

Ich liebe einfach alles an dieser Tasche! Sie ist wunderschön und hat die perfekte Größe. Das war meine erste DIY-Box und das erste Mal übrhaupt, dass ich mit Leder gearbeitet habe. Alle Schritte sind super beschrieben und absolut machbar, man muss nur mit ein bisschen Mut rangehen und einfach machen.

Meine kleines Meisterwerk 🤎🤎 Es dauert ein bisschen aber es macht unglaublich viel Spaß. Ich liebe die eckige Klappe. Und die Farbe ist einfach der Hammer

Heute ist meine Businessbag in Kroko-Nemo fertig geworden. Dank der tollen Anleitung war die Tasche für mich sehr gut machbar. Ich bin total Happy und glücklich über das Ergebnis 🤗

Die Fertigung der Business Bag hat unglaublich viel Spaß gemacht! Ich habe sie ohne Henkel genäht, da ich sie nur mit dem Statement Gurt über der Schulter tragen wollte. Der cleane Look ohne Henkel gefällt mir sehr gut. Die Tasche bietet ausreichend Platz für den Büro Alltag (Laptop, A4block, Ladekabel für Laptop und Handy, 0,75L Glasflasche, Bäckertüte, Portmonee, Schlüssel und Handy haben ohne Probleme Platz.

Mein nächstes Masterpiece ist fertig. In Midnightblue ist diese BusinessBag ein absoluter Klassiker, trotzdem modern designt. Ich liebe sie und freue mich schon auf ihren Einsatz. Die Anleitung ist wie immer toll gestaltet und gut verständlich. Die Umsetzung etwas herausfordernd an der ein oder anderen Stelle, aber in Summe gut machbar.

Das war nicht meine erste Bags & Pieces Tasche, aber auf jeden Fall die, die mir am meisten Spaß gemacht hat! Mit der wirklichen tollen und detaillierten Anleitung und den Videotutorials ist diese Tasche für jeden machbar. Und vorallem super individualisierbar. Ich habe zum Beispiel insgesamt drei Reißverschlüsse verarbeitet und so meine Business Bag super aufgeteilt.

Absolutes Masterpiece, aber macht super viel Spaß neue Techniken zu üben. Die Tasche ist super konstruiert, Mega stabil und dazu noch super schön. Einfach happy mit meiner Wahl 😍

Die Business Bag war das erste Lederprojekt überhaupt für mich. Ich habe keine Ahnung vom Lederhandwerk gehabt und jetzt halte ich die fertige Tasche in meiner Hand und bin absolut begeistert. Sie ist so toll geworden, die Qualität ist mega, sieht aus wie gekauft. Der Prozess hat mir so viel Spaß gemacht, dass ich gerade die zweite Tasche fertige. Ich finde die Möglichkeit sich selber eine Ledertasche zu nähen toll: es macht Spaß, entspannt, kostet weniger als eine fertige gute Ledertasche, sieht Hammer aus und hält so viel länger als Taschen aus Kunstleder, die ich schon leid bin. Bin infiziert!

Die Herstellung war dank der ausführlichen Anleitung sehr gut machbar. Für die Magnete habe ich ein dünneres Garn genutzt und somit kaum Abzeichen. Und das Beste, es passt wirklich alles rein!

Ich bin einfach immer wieder begeistert von den DIY-Boxen. Gerade bei der Business Bag gibt es viele Möglichkeiten der Individualisierung. Ich habe hier zwei Hochkantschließen angebracht, ich mag die Symmetrie. Die Innentaschen habe ich mit einem Reißverschluss verarbeitet. Und auf dem Taschenboden noch ein Trapunto. Ich liebs einfach 🤩

Ich liebe, liebe, liebe diese Tasche. 😍 Das war nicht mein erstes Bags and Pieces Projekt aber eines meiner Lieblingsprojekte. Wenn man sich an die spitzen Videoanleitungen hält, ist es wirklich super machbar. Die Größe ist einfach perfekt. Egal ob Laptop oder auch mein riesiger 2,8L Trinkkanister passen rein. Absolute Empfehlung. Go girl‘s!! ✨

Our DIY box is designed so that you can make your own bag without any prior knowledge of leathercraft. All the materials you need are included in the DIY box, you don't need to buy anything extra.
The highlight of our DIY boxes:
The pieces are already cut and have holes for sewing. This way we can guarantee that everything fits perfectly and you can sew the bag by hand without any effort. Note: For this bag you have to poke a few holes in the leather yourself using our included templates and the enclosed awl. With the metal accessories we also make sure to only use parts that can be attached without special machines and are still well secured.
As soon as you have put together your DIY box, you will receive an email from us with the order confirmation and access to the instructions and basic videos. You can then watch these in advance or when your DIY box arrives. And then you can get started!
Our answer - always: YES!
Why are we so sure about this?
Because over 7,000 people have already sewn one of our DIY boxes and over 92% of our customers have never worked with leather before or have only completed small craft projects. Because the techniques of leathercraft - gluing , sewing and edge processing - are repeated over and over again and we have created detailed explanatory videos for all three topics, you will have learned everything you need to make your leather accessory in just a few minutes.
In addition, the leather parts are already cut and have holes drilled. So, technically speaking, there is only one sensible way for the parts to fit together. Of course, we have also explained this with photos and text in our step-by-step instructions.
If, contrary to expectations, you do have any questions, our popular and highly rated customer support will be happy to help you. You can reach us Monday to Friday from 9 a.m. to 5 p.m. via email at hello@bagsandpieces.co.
Despite everything, an important note:
This DIY project is perfect for you if you like trying new things and generally have a certain amount of patience for larger projects.
This bag design is a complex design with a variety of different manufacturing steps.
The individual steps are not complicated. If you follow the instructions step by step, even a beginner can create this masterpiece. Let's go! 🙌🏼
We estimate the production time for this bag to be 20 - 25 hours, of which around 8 hours are spent making the bag flap with handle (including drying time for the edge paint). If you have never made a bag before and are watching the instructions and videos for the first time, it may take a little longer.
Sounds long?
It is! In the end, that's what distinguishes handmade items from fast fashion. Many of our customers say that they have a completely different appreciation for their handmade products and are incredibly proud to own a 100% individual and handmade handbag. And beware: it's addictive!
So if you want some me-time, a break from your everyday life or some creative time with friends and you enjoy learning new techniques, then the time will fly by. You can also divide the steps up and work on the bag piece by piece. Don't forget: you are making a real masterpiece!
The leather in our standard collection comes from a Veneto tannery that has been working with leather for more than 20 years and supplies many well-known luxury leather goods labels. With innovative methods, especially in the area of water treatment and resource-saving techniques, the tannery combines traditional craftsmanship with modern expertise.
The leather in our special editions mostly comes from surplus sales in Tuscany or is our own production that we commissioned from Italian tanneries. Surplus sales are leftover stocks from major luxury leather goods labels who no longer want to use these leathers as they work in seasonal collections. The leather is carefully selected by us on site, so that we can also offer very good quality and great features here. Treasure hunt, next level!
The other materials such as metal accessories, straps and other supplementary items come from suppliers in the leather processing industry. We source these from all over the world but especially Italy, Spain, Portugal, China and France depending on where we can find the best product for your DIY box.